3.30.2014

Leave it to the PROS


I am a girl that is all for a good DIY!

However, when it comes to certain things I think it is better to leave it to the pros. 

I gathered my top 5 beauty services 
that should be done by a professional, not in the comfort of your own home. 

As a professional myself, I can promise you there is a reason I Spent almost 20K & 1800 hours to receive an education in cosmetology. I know what I am talking about, I know what looks best, works best and is right for my clients. As a stylist it is my job to educate you on how to style your hair at home and what products to use to recreate the looks I give you in the salon. It is also my duty to inform you of when you are wrong and pull the I'm the professional card. 

You wouldn't go to your doctor's, expecting him/her to tell you what is wrong with you just for you to turn around and say " No actually, my old doctor told me this." or "Well that's not what I read online."

So below are the things I feel you should release the reigns and let your stylist take control of!

1.All over color

2.Highlights

3.Waxing

4.Haircutting,
 Yes this includes Bang Trims!

5.Extended wear Mani's


1 & 2 
I am going to combine into one as I inform you on the effects of box color. 


Box Color 101: 

When using any brand of box color you are using harsh levels of ammonia on your hair. 
Box color doesn't come with different level options for the developer that activates the color. 
Box color is a one size fits all, and lets be honest 9 out of 10 times that is never the case!
Once ammonia is applied to the hair it actually blast the hair follicle wide open and changes the hairs pH level. 

I know most of you don't take into consideration or even care about your hairs pH level. But you should! When your hairs pH is too high, it leaves the cuticle wide opening allowing and even increasing the possibility of damage. When the cuticle is left open, it has the same affect of leaving a door wide open in your house. anything can come in, and go out whenever it pleases.

So all of that color you just applied has nothing locking in it. It will fade faster, and dry out quicker. You want your hair cuticle to be closed in order to keep all moisture and luster inside. That is what creates a healthy shiny look!

There are professional shampoos you can buy to bring your hair back to its natural pH level that should always remain at the 6-8 level on the pH scale keeping your hair in the middle of the acidic/alkaline diagram. 


Buying a $10 box color seems like the easy way out, but $300 later for a color correction in a salon once you have messed up your hair could have all been avoided for just an $80 color to start with!

All Over Color:

Another possible ingredient in box color is metallic salts. metallic salts actually acquire a build up on the hair strand each time you use the dye, and it allows the hair to grab darker on the ends each time. This is something you may have noticed before when using box dye.

 There is no guarantee you will have even results. Roots are virgin hair, your mid shaft to ends are chemically treated from the previous times you have dyed your hair. There is no logical way to think they would both turn out the same, even if the box says jet black, it will not be the same shade of black. 

When all over color is applied in the salon, often times two different formulations are created for the roots and ends and applied separately!

Box color is also only ONE color. In the salon I, 9 times out of 10 mix 2 to 3 colors per formulation to customize the color to match my clients skin tone, desired look, and bring out their eyes perfectly. 

Highlights:

I am a blonde. Therefore Highlights (when foils are applied to the head) are used when coloring my hair. I can not do this myself. Neither should you. There is no way you can see the top of your head to get as close to the root as your stylist is going to be able to. Even if you have a friend doing, maybe they are even a professional.. 
If you are still using box color and not the professional stuff it is not going to turn out as good. Whatever the products is, is going to be too strong for the job you are trying to do. 

When using blonde box color to lift, they put the highest developers in the box to ensure no matter what color the consumer starts with that the color will lift! 

As stylist, we take into consideration what your existing hair looks like, feels like and what texture it is so that we choose the correct developer level to pair with the lightener so that it gets the job done right, while mainting the integrity of your hair. 

Quick Tip:
Heavy duty dye jobs are not a one stop shop! When it comes to highlights, and going lighter I always tell my clients "blonding is a journey not a destination." I have been every color under the sun but I always resort back to my natural and most favorite, BLONDE! 

Here is a little walk down memory lane of my different looks!


3. Waxing:


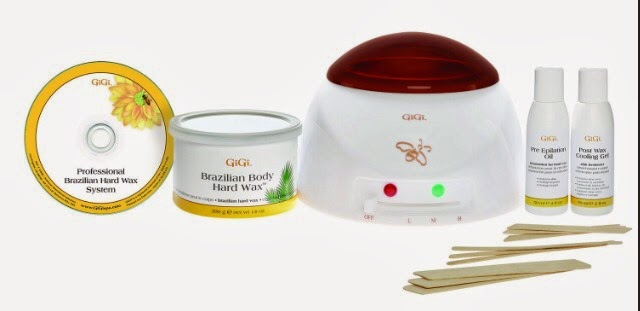
I have touched on this in my brow 101 post, but waxing should be left to the pros!
Yes they sell waxing kits at Sally's, but that does not mean you need to buy one and go all DIy on me!

I myself don't even try to wax my own brows. I let the pros do their job. They are skilled at shaping, filling and making them frame my face perfectly. Its an art! Then in between my visits, I just follow their lines and fill them in myself! 

To see a "how to" on filling in your brows click here

Not only brows, but all other waxing imaginable should be left to the pros! You are not trained, you do not know what to look for before waxing and what signs to look for that show you when to avoid waxing period.

You do not want to create skin care issues by trying to save money!

4. Haircutting/Bang Trims

I don't think anyone should ever cut their own hair. Yes people do it. Some professionals even claim to cut their own hair. I personally do not see how, I do not have eyes in the back of my head. I can not see what is going on back there, let alone get the correct hand positioning to ensure an accurate cut. 

Even if you have long hair and can see what you are cutting, don't do it!
It will not be even.

If you are not a professional you probably don't understand all the laws of cutting and what goes into it.  That is why you should leave it to the pros!

I have plenty of clients that come in, sit in my chair and always start with
"Don't kill me but I trimmed my own bangs, I couldn't take it anymore"

I have been there, and cut that! 

My own mother is one of these clients. 

As a pro I can tell when she got a little scissor happy, but she feels the need to explain every time. 
She started out using rusty kitchen scissors like she was in a Miranda Lambert video or something!

I finally broke down and got her a pair of actual shears from Sally's, and taught her the proper way to trim her bangs since I knew she would keep doing it anyways!


For all you girls out there that got "banged" just call your salon, and make a bang trim appointment!
Yes they exist and usually only cost a couple bucks. Most likely you don't even need an actual appointment! They take a few seconds and will save you the embarrassment of a jagged, zig zag wanna be swoop bang!

5. Extended wear Mani's


I LOVEEEEEE GEL manicures! 
Gel, shellac, whatever you use is amazing!
I am so happy this was ever invented. 
As a stylist my hands are in and out of water a 100 times a day. They dry out and regular polish will chip, stain and come off in no time!

Extended wear Mani's are the only kind I get now. 

I am not an acrylic girl. I am all about natural nails. 

So this is the best solution and mixture of both!
An extended wear Mani will last anywhere from 1-2 weeks.

Lately the stores have been selling "at home kits" That come with a base, top and few polish colors as well as the light that is used to cure the polish to the nail. 

I myself don't even own one of these. 
Unless you have been trained on how to apply it, it will not last. 

It has to be done correctly to ensure that it will not lift. The pros know how & could probably do it in their sleep for as popular as this service has become! 

You can get an "at home kit" from anywhere to $40-$80 bucks. 

When you receive an extended wear Mani in the salon it can cost you anywhere from $20-35. 

Yes it seems like the better deal to buy the kit and just DIY. 
But Like I mentioned unless you are trained it will not last. 
If you get the tinest bit of the base, color or top coat on your finger it will lift and end up peeling off the entire nail that was polished. 

There for when you DIY, it's not so extended wear. 

I have done it myself, and have had this issue. 
I polsihed them using the light, not even 20 mins 2, 3, 4, 5, nails later had all popped off!

so when it doubt, ask your stylist about it!

xoxo,
molly

3.28.2014

Bobby pin 101


First of all, who's bob??? 

Bobby pins actually got their name in the late 1800's due to a hairstyle know as the "bob cut". This trend became popular in the 1920's because the pins kept their bobbed hair in place! 

Whew. Now that, that's out of the way & we a can sleep tonight, let's talk about the proper way to use them & some of my favorite tricks on hiding them and making sure they stay all day! 


Who knew there was a correct or incorrect way to use a bobby pin??

The picture above shows you that the ridge side of the bobby pin is the side you want to put facing down on your scalp. 

This side allows the hair to be grasped better and actually will hold it tighter. 

How many times have you opened a bobby pin with your teeth, or some other device? 

I have! A million times. Out of habit I still catch myself doing it from time to time! But we were wrong!!!!!!!!!!!!!!!!!!! 

Bobby pins, when used with the ridge facing down are more likely to hold a style better when they are not forced open!  When you force them open it just weakens their ability to stay closed.  

Another tip is to weave it into your hair like you are sewing with needle and thread! The weaving technique allows it to adhere to different sections of the hair and it has less chances of slipping out. 


When someone's bobby pin shows it's just as bad as someone's bra strap popping out or someone's underpants creeping a little to high! 

Bottom line, it's not cute! 
Even if it has been dipped in rhinestones & glitter, doesn't make it any prettier. 

Here are 3 easy steps to conceal them no matter what style you are trying to create. 


Step one: 
Once you have twisted, braided, pin curled or whatever it is you are doing...

Place the bobby pin over the entire section without opening it with your teeth or fingers; with the flat surface down (the incorrect side) and the ridged surface facing up (the correct side) 

I know this seems backwards from everything I just told you above, but as steps 2 & 3 unfold you will see the bobby pin will land correctly against your head as I directed with the ridge surface down. 


Step 2: 
Take the bobby pin and stand it up, pressing it against your scalp like pictured. 


Step 3: 
Lastly use your fingers to glide the bobby pin ridge side down against your scalp and shove it into the braid, twist, or styled section to secure it tightly. 

If it does not feel tight, it was not done right! It may take some practice! But once you nail it, you will never use a bobby pin another way again! 


Life changing I tell you!

Another trick is a simple as a little spritz! 


Line a row of bobby pins on a piece of paper or a towel and space them apart. 

Use your favorite hair spray 
(mine is Kenra 25 volume spray) 

Hold 2-3 inches above and spray the bobby pins for a few seconds. 

Flip them over and repeat on the other side. 

It will make the bobby pins stick better to any texture of hair, keeping them in place no matter how you install them! 


Bob away!

Xoxo
  Molly. 

3.21.2014

Fake Lash Tutorial

I have been called fake more times than I can count growing up.

Only when it comes to my eye lashes are those people right.

I am madly in love with fake lashes.
Aside from having my brows filled in, lashes are next up on my list of must haves before I leave the house. They can spruce up any look, and can even be worn with no makeup at all.


There is no wrong way to apply them, this is just the way I have found to be easiest.


Like all products, there are tons of types of lashes.
This is only the 2nd time I have used this salon perfect line I bought at Walmart.

I usually use the ardel brand that can be found at any drug/grocery store.

There are lots of shapes and sizes to achieve all types of looks.
If lashes are new to your world, I recommend Ardel's "babies" brand. They are simple
and when starting out, less is more.

Glue is a preference. There is no shortage of choices in this department either.
My favorite is the Duo line, but I have used many others, such as Lashgrip.


Step 1: apply all the makeup that you are going to apply for the day. Lashes go on last! Everything else needs to be done, they are just the final touch. In this photo I have already applied foundation, blush, eyeshadow, eyeliner, mascara, and filled in my brows. No Lashes are currently applied, just my natural ones.


Step 2: remove the lashes from the packaging and decide on the glue you want to use. The lashes should be smaller at one end and get longer. The shorter side goes on the inner part of your eye next to your nose as the longer more dramatic side goes on your outer eye towards your temples. Just like your natural lashes. You may also need to trim them. They are NOT one size fits all. Customize them if need be to match your eyelid.

All brands offer two different colors.


Clear: dries clear. Hence the name. most like this kind because you cant see the glue once it is dry and it doesn't mask the makeup that you have already applied.


Black: the black glue, tried jet black, and it is my personal favorite because I find that it covers better and acts as extra eye liner to complete my look.


Step 3: apply the glue to the lashes. I used the lash applicator to hold the lash still with one hand, while using the other hand to apply the glue to the lash. The thinner the line, the better.


Part 2 of Step 3: Once the glue is applied to the lash, I let it sit for 15 seconds so that it gets "sticky" and the I apply it to the center of my lash line, as close to the lashes as I can get it. I used the lash applicator for this step.


Step 4: is where you use the tweezers to adjust the placement and secure the ends. Once you have the entire eyelash secured wait 30 seconds for it to dry, and then double check to make sure it's not going anywhere. Giving it those extra seconds helps the glue to adhere to your actual lashes, and will prevent you from moving it around when you double check it. (You wouldn't want to do it all over again, although i have done that mannnyyyy times! Practice makes perfect)


Ta-Da!


I love the effect lashes give and I always get so many compliments on them.

To remove the lashes lift and pull up on one side peeling towards the other side slowly. No need to rip it off like a band aid.

You should never tear out your actual lashes. If you are, then you are probably using too much glue, or your glue has gone bad! & It's time to buy a new one!

Happy lashing!

xoxo Molly.

3.15.2014

Finding Your Faceshape


Most woman don't even know what Faceshape they have, or how to discover it. It is something that should be taken into consideration before each hairstyle change.

First let's figure out what geometric shape your face best resembles. 

There are many different face shapes but to keep things simple I am going to cover four basic ones. 

Oval: can also be called oblong. This shapes allows your face to have a narrow forehead and narrow chin, making the widest part of your face in your cheekbones. This shape is ideal and can wear almost any style flawlessly. 


Square: is a common face shape where your temples and jaw are aligned. This shape requires more feminine hairstyles to make the shape softer, and less defined. 


Circle: otherwise known as round! But let's be honest, who wants to be called round? This Faceshape is full from above the eyes to the chin, with no distinct lines. This is one of the only shapes that requires hair to create an elongating affect. 


Heart: which can also be referred to as inverted triangle is a petite face shape, where the foreheads wider than the jaw bone and chin. In most cases a bang is worn to camouflage the wider part of the forehead.


If these pointers still can't help you make up your mind on what face shape you are, there is a little trick I learned in beauty school that works like a charm. 

It requires you to stand in front of a mirror, that you are able to reach out and touch. Using lipstick, dry erase marker or eye liner to literally draw the outline of your of your face shape while staring at yourself in the mirror. Then take a step back, and see what shape you have created!! 

If you are ever in doubt when getting a new cut or style, ask your stylist their opinion. They do this for a living, so allow them to do their job and help you find what works best for you! 

Xoxo
Molly

3.06.2014

Teasy tutorial

First up for Fan Pick Fridays-
The most common question or how to suggestion I get is by far "how do I tease my hair??" 

I have had many loyal clients get hooked on me, by being able to teach them how to tease their hair at home! 

Leaving the salon looking fabulous is great, but what about the in between visits & the every day do's? 

I feel as a professional, that's my job too! 


So here is a 5 step tutorial on how to tease your hair like a pro! 

You only need the following things:
The products can vary based on your favorites. I personally enjoy the Kenra Line. So I like to use their platinum "dry shampoo" and the one & only volumizing hair spray "25" !  You will also need a clip & a comb with fine & wide teeth! 

Ready, set, GO!

Flat, drab & in need of volume !


Step 1: using a dry shampoo or any volumizing/texturizing spray at the root and rub in with your finger tips creating a gritty base for the tease to sit on. 

Step 2: section out a thin Mohawk section over your part line from your forehead to our crown. This will be left in the clip until the very last step!

Step 3: take the fine teeth side of your comb and make small circular motions with your wrist allowing the comb to "back comb" your hair near the root only-on each circle creating, basically a rats nest of matted looking hair!
As you can see I did this all around my head following the lines from my sections of hair that is clipped up!  This is the time you want to decide on how much volume you want. For me, the higher the hair- the closer to God! I should have be born I Texas! I love me, some big hair!


Step 4: unleash the clip & use the wide teeth side of the comb to smooth it over all of the crazy teasing! This is the trick to making a tease look professional. 
Leaving a little bit out to smooth over makes a world of difference & allows you to cover any flyaways so it looks more tammed. 


Step 5 part 1: finishing spray! Lock this look in place with a heavy duty hair spray!

Step 5 part 2: best advice I can give you, is HAVE FUNNNNNNN. Hair is a way to express yourself! I always use my Kenra 25 hair spray to get my look even BIGEER!!!!  


Don't like to tease, but still want volume?
Here is a little trick using only hairspray & your fingers:
Using one hand, take your finger tips and dig in grabbing hair at your crown, and lift up. 
Use your other hand to spray hairspray on the lifted section. Hold your hand in place with the hair lifted until the hairspray drys and sets in place (this should only take about 10-20 seconds) 
And release your fingers. The hair should stay in place! You can repeat this step as many times and in as many different areas as you need to until you achieve the amount of volume you are looking for!

Tips on getting that teasy rats nest out of your hair, at the end of the day: 

1. Softly brush it out
2. Spray a leave in conditioner on your hair while it's still dry before you even get in the shower 
3.conditioner, conditioner, conditioner !
Now would be a great time to do a conditioning treatment if you have time!

Xoxo
Molly